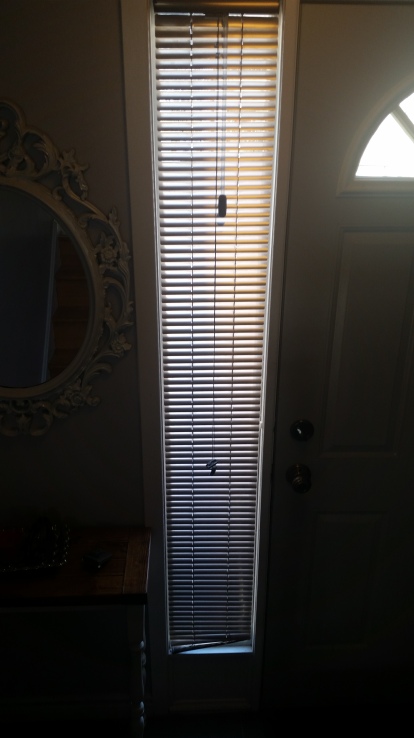
When we purchased our home, the previous owners stuck to “run of the mill ” cheap blinds to cover their windows. Doron couldn’t stand the horizontal vinyl blinds near the entrance. It also didn’t bring in much light.
He suggested that we frost the glass on that particular window and take down the blinds. I was nervous to get the whole window frosted in case I ever wanted to look through it, so we had the greatest idea! Use a stencil with my favourite pattern and buy a spray can of window frosting to Do It Myself!
First, I ordered a beautiful stencil online. I chose a Moroccan trellis pattern. I highly recommend the selection offered at www.cuttingedgestencils.com
Second, I picked up a spray can of frosted window coating.

Now the hard work… This requires patience and precision. Make sure you wear a basic face mask to avoid inhaling all the fumes because this project is done indoors. To begin, we removed the blinds.
We happened to order a stencil that fit the space perfectly so we just started from the top. To ensure this stencil sticks to the window very tightly to avoid getting particles in the pattern or lines, give a light spray mist (water or windex) to one side of the plastic stencil and place on the window. It should stick right to it. If you don’t do this step, the spray particles will get behind the design.

Make sure to cover the spaces that are not being sprayed with cardboard (top and bottom). When you spray, try and coat evenly, generously, but not too close or else it will drip and ruin the design.
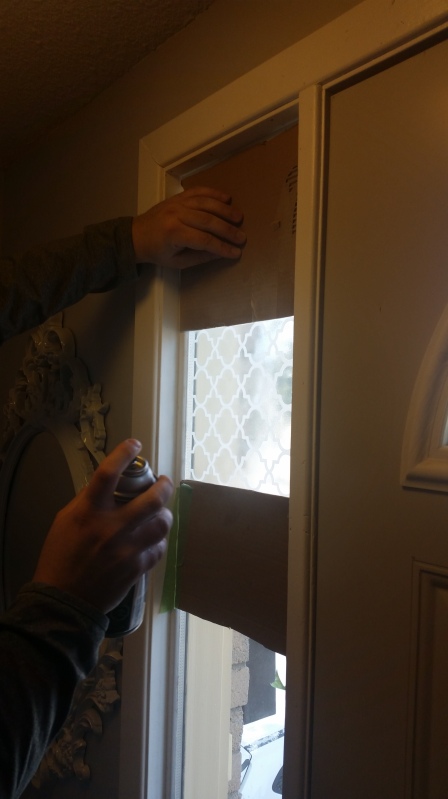 We moved the stencil down as we covered one area. Make sure you let it dry before starting a new area or removing the stencil after you’ve sprayed. It comes on clear but dries cloudy or frosted. Also, be gentle when moving to the next section as the spray may not have dried 100%, and you don’t want to scratch the area that was completed.

In case some of the spray particles made its way onto the design, use a Qtip and carefully outline the design clean.
 Now, you will see that lines have been created where one sheet starts and the other one ends. To fix this, we placed the stencil over two different areas and did a second coating. This should be done over all the visible lines.
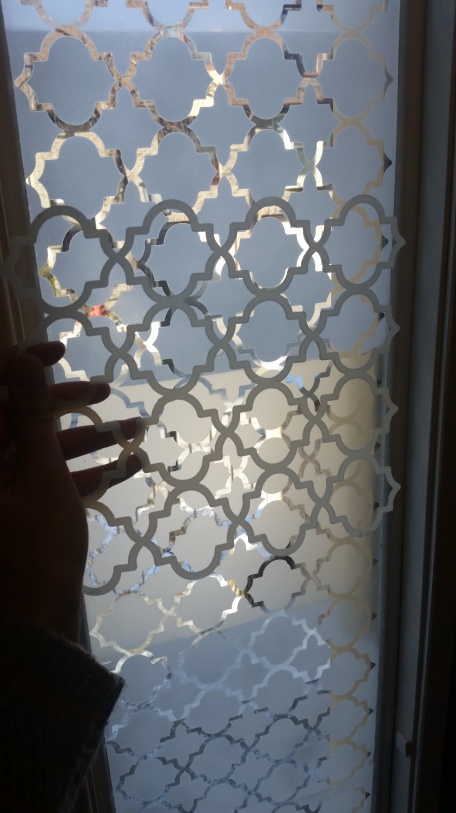
Before you do the second coating, make sure the first coating has dried well. If by the second coating, its not even, do a third coating.
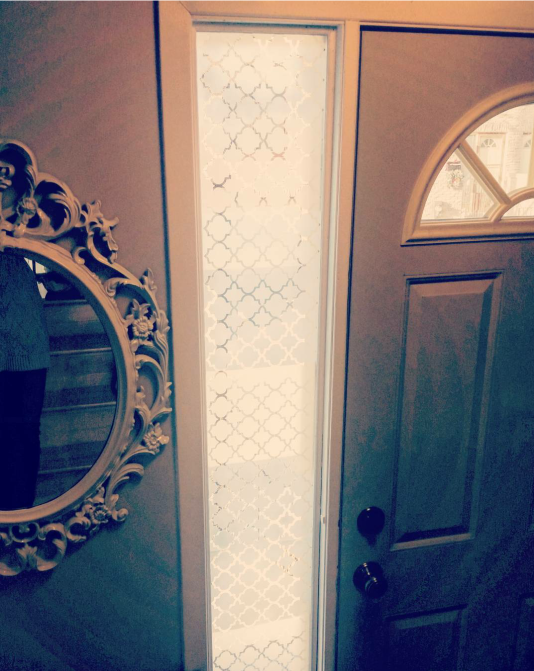
After the second coating or until the desired outcome has been reached… Here is the finished look….
For more Do it Yourself (DIY) ideas, follow me on instagram @designwithrev

Why a great idea
LikeLike